
Introduction
If you you want your garage floor looking good and want it to be easy to clean up oil spills, then you should consider what Garage Floor Epoxy is right for you. When applied correctly epoxy is one of the most durable and toughest finishes you can use for your garage floor. Not only will it protect your garage floor, but it will instantly transform the look of your garage. No more boring ugly stained nasty looking cement, only a professional looking floor with good looks and functionality. Epoxy has quickly become a top choice for garage flooring my home owners and mechanics shops alike all over the world.
Epoxy Garage Floor coatings are being used everywhere for not only residential uses, but for commercial uses as well. Not only will it give your garage a “showroom shine” but it’ll also protect for years to come. It makes oil and grease spills especially easy to clean as they will not have a chance to soak into the concrete. There are a huge variety of solid colors, custom colors, blends and flakes that can be added to make for nearly any floor color combination or theme that you desire.
Before we review the Top 5 Garage Floor Epoxy Coatings, lets talk about what epoxy coating is all about, how it’s applied, the costs associated with it and the benefits it has for you along with a few other things.
NOTE: This article is extremely long to help you completely understand Garage Floor Epoxy and everything that goes along with it. But if your not interested in reading it all then reference the table of contents below to skip to what your looking for.
Contents
- 1 Introduction
- 2 Benefits of Epoxy Garage Floor Coating
- 3 Epoxy Garage Floor Coating Design Options
- 4 What Types of Epoxy Coating Should I Use?
- 5 7 Reasons Why Epoxy Coating Peels Up
- 6 How Garage Floor Epoxy is Applied
- 7 Prep Your Garage Floor before using Epoxy Coating
- 8 3 Steps To Check if your Garage Floor is Prepped for Epoxy Coating
- 9 Garage Floor Epoxy FAQs
- 10 Top 5 Best Garage Floor Epoxy Coatings
- 11 Two Clear Top Coat Coatings You Should Consider
- 12 Final Verdict: Garage Floor Epoxy
Benefits of Epoxy Garage Floor Coating
Many people ask what makes epoxy floor coatings a great finish for garage floors? First of all they had a nice look to the floor while applying the epoxy to the floor adds a very durable coating that’s resistant to clipping, chemicals, spills, impacts, stains and surface abrasions. No more panicking if a bicycle falls over or your spill oil.
Thicker coatings do a good job covering up minor imperfections in the concrete. Since epoxy is a topical sealer it’s anti-dusting. Did you know that some of the dust in your garage that ends up collecting on shelves, storage cabinets, work benches and cars is actually from the powder that cement is made from and known to shed. From normal traffic alone bare concrete can kick up creating dust. Epoxy coatings will eliminate concrete dust, but you’ll still have plenty of debris from opening the garage door alone still.
Since epoxy is a topical coating, it’s naturally moisture resistant which is a great benefit to residents of snowy climates. The coating makes it much easier to clean off leftover snow, ice and road salts that fall off your vehicles while they’re parked in the garage. Road salt is known to slightly stain concrete over time making it appear lighter.
While some epoxy coated surfaces can be slippery when wet, you can add the colored acrylic flakes that add grip to the floor coating. If you live in a drier climate, then you properly won’t have an issue anyways. But you can also add some slip resistant aggregate into the final coating which helps create a non-slip surface.
Garage floor epoxy coatings have always received raved reviews from homeowners, hobbyist and professional mechanics alike. Remember when applied correctly they’ll be stain, brake fluid, oil, gasoline, and anti-freeze resistant and then some, you get the idea. Anything that spills can be easily wiped up without having to worry about any leftover stains, even if the substance sits for awhile before being cleaned up. If you are going to be rolling around floor jacks, tool boxes or using jack stands then you have nothing to worry about either has these coatings will not be damaged from that. It’ll even lighten up the garage environment assuming you’ve chosen a lighter finish.
It sounds like epoxy coatings are resistant to everything, however that’s not the case. Epoxy has two main enemies, with the first being welding. This can be very hard on the epoxy because of the hot slag that comes from welding falls to the ground causing burn marks. This could become a peeling point if burned enough. Moisture vapors are also bad and while we can’t also control this, it’s important to know if you have a lot of moisture under your slab. You can test for this and we’ll talk about that below in another section. If the transmission of moisture vapors from under the slab of concrete it will cause the epoxy coatings to de-laminate if it’s too high of a rate which leads to peeling. If this is the case for you, then you might just need to expect the need to re-coat your floor every couple years when needed. There are a few options to slow this process down, but this cannot usually be eliminated.
Epoxy Garage Floor Coating Design Options
What Types of Epoxy Coating Should I Use?
There is a lot of different epoxy brands available and it can become confusing to determine which type of epoxy coating you should use for the best garage floor coating outcome. There are mainly 3 different types of epoxy.
- Waterborne Epoxy Paint
The water based epoxies are easier to apply, in fact they are more like a paint than epoxy. This drastically lengthens it’s pot life which reduces the worry of getting it applied quickly like that of other thicker epoxies. These types are typically what you’ll find in the do it yourself epoxy coating kits from brands such as Quikrete or RustOleum for example. These can be purchased at local home improvement stores or at many places online like Amazon.These types of kits are designed as a single coating system with around 50% solids content of epoxy. The coverage rate per kit is usually around 250 square feet and they roll on easily and cure as a very thin coat with a semi-gloss finish.While these are the most inexpensive and easiest to apply, this comes with less durability(you get what you pay for). Their stain and chemical resistance isn’t as good and they are susceptible to the “hot tire lift”.You can improve the durability of these water based epoxy kits by adding a top coat of epoxy clear sealer which doubles the coating thickness along with this spill and hot tire resistance. You can also also just get a more expensive professional multi-coat kit as well.
- High Solids Epoxy
These are a step up and considered a commercial grade epoxy coating. These will have the best resistance to chemical spills, stains and abrasion. Their high solid content make this a 100% solids epoxy. One coating of these 100% solids epoxy is 2-3x thicker than the water based epoxy.High solids epoxy are great for color base coats and multi-coat systems and are also available in many color options. Since this is a commercial grade product you can expect to pay 2-3x as much then that of water based epoxy. Most of these kits due come with all the tools needed to apply these coatings to your garage floor.They are worth the money, especially for homeowner or shop owners with high traffic garages. However this type is not Do It Yourself friendly like the water based epoxy. The viscosity is much thicker and it needs to be back rolled when applied. This makes the pot life significantly shorter which requires it to be applied quickly, usually within 30-45 minutes after mixing.
- Clear Epoxy or Polyurethane Top Coats
These coatings are used to improve upon single coat 100% solids epoxy. These are referred to as top coats and not only to they add durability and thickness, but they also add a deep gloss and shine to your garage floor.If you decide to add a top coat, this is the perfect time to apply additional paint chips to your base coat. These can be sprinkled on lightly if you want a light flake look. Or, you can apply them in a full refusal process, which is where you throw on chips until they don’t stick anymore creating a thicker flake look.A full refusal is a good idea if you the floor to have some texture. This also increases it’s thickness and durability while helping to produce a anti-slip surface. Or, you may just be out to achieve a certain look. Adding more multi-colored chips can give you a custom look.
7 Reasons Why Epoxy Coating Peels Up
- Soft Concrete Surface
Having a soft concrete surface can be caused by a couple different factors. This can be caused by poorly poured concrete, a bad finishing or combination of both. A couple key indicators of soft concrete are heavy dusting occurring, crumbling concrete, or areas can be easily gouged and scarred.If you’re dealing with this issues you can try to grind it and possibly apply a densifier which hardens the surface. Unfortunately even this might not be enough to prepare your concrete for epoxy and will likely have issues with the coating coming off pretty quickly after application. You might even need to completely replace the concrete.It’s recommended that you contact a professional floor coating company if you have soft concrete. The professionals can inspect your concrete surface and see if an epoxy coating is right for you. Or, if you are looking at attacking the job on your own then you should consider interlocking floor tiles or garage floor mates as this might be a better solution for you.
- Poor Surface Profile
A poorly prepared concrete surface is the most common culprit to epoxy peeling. This is usually because of a bad surface profile where the surface isn’t rough or porosity enough for the the mechanical bond of the epoxy to concrete work.It’s important to achieve the correct surface profile for epoxy to adhere properly and do this you need to acid etch the concrete at the bare minimum. While grinding the concrete is the preferred method, it’s not a very feasible method for most DIY applications.The correct concrete profile exposes the pores and this is how the epoxy can sink into the concrete ever so slightly enough to get it to “bite” and adhere nicely to the concrete surface. One way to know that you are profiling the concrete correctly is but the appearance. The concrete surface will appear lighter with a rougher texture similar to that of a 100 grit sandpaper. You can test this by pour a little bit of water onto the concrete in multiple areas. It should immediately turn dark while the concrete absorbs the water within less than a minute.Many of the cleaning and etching solutions that come with residential type single coat garage floor epoxy kits are not effective enough to achieve the appropriate concrete surface profile. This is mostly due to these solutions consisting of citric acid crystals, which manufacturers use since they are safer for the environment and less harmful if used incorrectly.Before acid etching any garage floor, you should also thoroughly clean the concrete before applying acid etching. The preferred acid to use is Muriatic or Phosphoric to help achieve the proper surface profile for the epoxy coating to adhere.
- Moisture
Moisture is the second most common problem associated with epoxy coatings peeling off of concrete garage floors. The water vapors from underneath the slab cannot pass through the epoxy. This creates hydrostatic pressure that can be forceful enough to lift the epoxy coating right off the concrete surface.Before epoxy application be sure to inspect your floor for signs of moisture. If you notice efflorescence or dark spots, that’s a sign you may have a moisture problem. So it’s very important to do moisture testing before starting any epoxy application or you could find yourself with peeling coating very soon after finishing the job.
- Oil and Other Contaminants
After you’ve acid etched your concrete and have the proper surface profile the epoxy to adhere to it’s also very important to check for any oil or other chemical stained areas. You may have previously cleaned these areas but want to make sure that they are still not repelling water and are now absorbent. Test these areas with the water test as we discussed above.Acid does not remove heavy grime or oil stains from concrete. You will need to use a free lime with the acid so it reacts in the concrete.These areas will likely still be darker in color then other non-stained areas of the concrete. Don’t worry about that, as long as those areas absorb water then the epoxy coating will have a good place to adhere to.The other contaminants such as silicone and polymer compounds from tires need to be cleaned too, but acid etching does not remove these from concrete surfaces. You will need to grind the concrete in order to remove these residues.
- Acid Etch Residue left on the Surface
While your acid etching concrete the solutions reacts with the free lime in the concrete. This process causes the calcium on the surface to breakdown which exposes the pores. When the calcium is removed by this reaction, it’s forms into a very fine white dust. This often isn’t cleaned up enough and causes adhering issues with epoxy.Since this white dust is so fine it will stick to any irregularities in the concrete surface and becomes difficult to remove. Just like in many other cases, if this white dust residue isn’t cleaned off completely then the epoxy will not adhere properly to the surface. Eventually you will have peeled up epoxy coating revealing the white dust residue underneath.There is no telling how much or how little white dust will be left over after acid etching. This residue is solely dependent on how much free lime is present in the concrete surface to begin with and how well the surface was originally neutralized and flushed afterwards.One way to help with this residue problem is to not let the floor start drying while acid etching. Also use liberal amounts of water when flushing out the surface. Using a a nice deck brush to scrub the surface while flushing it out with water will help too. If you do still end up with this white dust residue leftover, you can remove it by scrubbing down the surface multiple times. Pressure washing the floor works best, but if you don’t have access to one you can wet the floor down using a solution of hot water and TSP. You’ll want to do this in sections that you can scrub. Then flush it out very good with at least a high pressure nozzle on your water hose. Sometimes you will need to do this multiple times depending on how much residue was leftover.
- Previously Sealed Concrete
A previously sealed concrete surface will not allow epoxy to adhere either and acid etching will not remove the sealer. Remember the acid only reacts with the free lime in the concrete and if it was sealed then the acid etching solution will just sit on the surface.You will have to grind the concrete floor to remove the sealer at the surface. If you are not sure whether or not the floor was sealed then you need do the concrete sealer test. Just like with other things state above you’ll want to drip water over multiple areas of the concrete to see how it reacts with the surface. If it immediately beads and just sits there then you have a sealed garage floor. If the water absorbs after a few minutes turning the concrete dark then you do not have any sealer on the concrete.In some rare cases these test are inconclusive. In this case you’ll want to apply a few drops of diluted muriatic acid to the concrete surface. If it starts to fizz or bubble then there is no sealer present. Again like with the water test, if the muriatic acid just sits on the surface doing nothing, then you have a sealed concrete.
- Excess Laitance
Laitance is the top layer of cement that is also the weakest layer. This layer sometimes appears to have very fine cracks and it consists of fine cement paste that’s produced by excess water bleed from the final troweling finish. Or, it can sometimes be caused by finishers who spray water on the surface to make it smoother.Acid etching does not do a very good job removing this fine layer, so grinding of the concrete will be necessary to get the epoxy to properly adhere to the surface. If epoxy is applied to this type of surface it makes for a weak mechanical bond which will eventually cause the epoxy coating to peel off.Another indication of concrete dust is a sign of excess laitance. If there is no dusting you can test it by scraping the surface with the tip of a screw driver. If it doesn’t leave much of a mark, or any mark at all then you should be able to do a acid etch and not have to grind the concrete.
Note: New concrete such as concrete in a brand new home needs profiling just as much if not more than older concrete. The effects of troweling the concrete to make it smooth create excess laitance (fine particles that washing does not remove) and an ineffective mechanical profile for epoxy to adhere to.
How Garage Floor Epoxy is Applied
It’s important to have a good floor preparation in order for the epoxy coating to stick to the concrete surface. This process is achieved by grinding, acid etching or blasting the floor to profile the concrete surface to prepare it for the epoxy coating. This is a very important part that needs to be done right in order for the epoxy to adhere properly. It is also a good idea to repair any damaged parts of the concrete along with any cracks before applying the epoxy.
The best epoxy garage floor systems usually involve multiple coats, which insure a durable and resistant coating that will last for several years. One of these coats is an epoxy primer, this coat is of course applied first. Primer helps bind the concrete to give a good adhesion for the following layers, which provides a thicker coating. Some of the primers can even act as a moisture barrier helping to eliminate the water vapors from coming up through the concrete which can cause the epoxy coating to bubble up and peel off.
The coat is known as the base or color coat and in many times is applied first without any primer depending on the manufacturer. This is the time when you would add the acrylic paint chips which adds the density and texture if you so desire.
Now onto the final coat or the clear top coat, which also helps add thickness and durability to the epoxy coating along with a nice glossy finish. This coat is what really helps give epoxy coated garage floors that great shine and deep look they are known for.
Another option for garage floor coating systems include a polyurethane top coat. These top coat usually makes the epoxy coating yellow a bit over time when exposed to sunlight. Since polyurethane is a two part polymer, it hardens just like epoxy does and is also a popular sealer and protectant.
Prep Your Garage Floor before using Epoxy Coating
- Remove Rust Stains
Combine an ounce of trisodium phosphate (TSP) in a gallon of hot water. Wet the concrete and use a push broom with rigid bristles to scrub. Let the solution soak into the concrete for 10 to 15 minutes. Rinse thoroughly.
- Remove Oil and Grease Spots Before Applying Epoxy
Before you power wash or paint/seal your garage floor, you’ll want to attack any oil, grease or rust spots.
- Cover grease stains with a layer of sawdust or cat litter. These materials absorb excess oil remarkably well. Leave the sawdust or cat litter on the floor for at least one day.
- Use a push broom with rigid bristles to sweep up the sawdust, cat litter and dirt.
- Pour dry dishwasher detergent or a concrete cleaning agent on the stain. Let the detergent sit for 45 minutes, then pour boiling water on the area and vigorously scrub the stained section with the broom.
- For stubborn stains, use muriatic acid in combination with your pressure washer set to at least 1200 PSI. Apply the acid according to the manufacturer’s instructions. Allow it to soak for a few seconds and rinse. Use baking soda on the cleaned area to neutralize the acid, and rinse.
- Oil and Grease Bonding Epoxy Primer
There are some amazing products that’s the answer to floors that have been contaminated with Oil & Grease that won’t come out via chemical and power washing’s. Typically you cannot epoxy paint over oil & grease stains, the epoxy will not adhere properly to the concrete. Many people have done this and the coating will come up quickly, especially in high traffic areas. Some epoxy primers let you roll right over oil contaminated floors and paint with no worries. Simply give your floor a normal washing & etching (don’t worry about getting the oil & grease completely out), let dry, mix the two parts of the primer together and roll on as you would regular paint. Let dry for 24 hrs and then paint with any floor epoxy products.
3 Steps To Check if your Garage Floor is Prepped for Epoxy Coating
It is very important that you make sure your garage floor is ready to take on it’s new Epoxy Floor Coating. This is especially important for any concrete that hasn’t just been poured and has years of who knows who soaked in. These 3 steps will help your brand new epoxy floor coating last for years to come.
- Moisture Test
If you think that moisture issues might prevent paint or sealer from bonding, here’s a simple way to find out: Cut out a 3-ft x 3-ft square of plastic sheeting and tape it down completely to your garage floor. If after a day or so, water collects on the underside of the plastic, you’ll need to put down a good vapor barrier before the primer coat. - Sealant/Etching Test
If you’re unsure whether your garage floor has previously been sealed, you can pour water on it to perform a simple test. The water should soak into the concrete relatively quickly. If it beads up or just sits there for a long time, the cement has been sealed before and probably needs to be etched before you can re-seal or paint the garage floor. - Etching the Floor
To etch the floor of your garage, apply a commercial concrete etcher, being careful to follow the manufacturer’s instructions. If the etcher fizzes up as it’s applied, you know that it’s working. Let the floor dry overnight. The concrete will now have a grainy texture, which offers a better surface for the paint to grip.
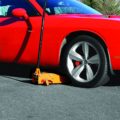
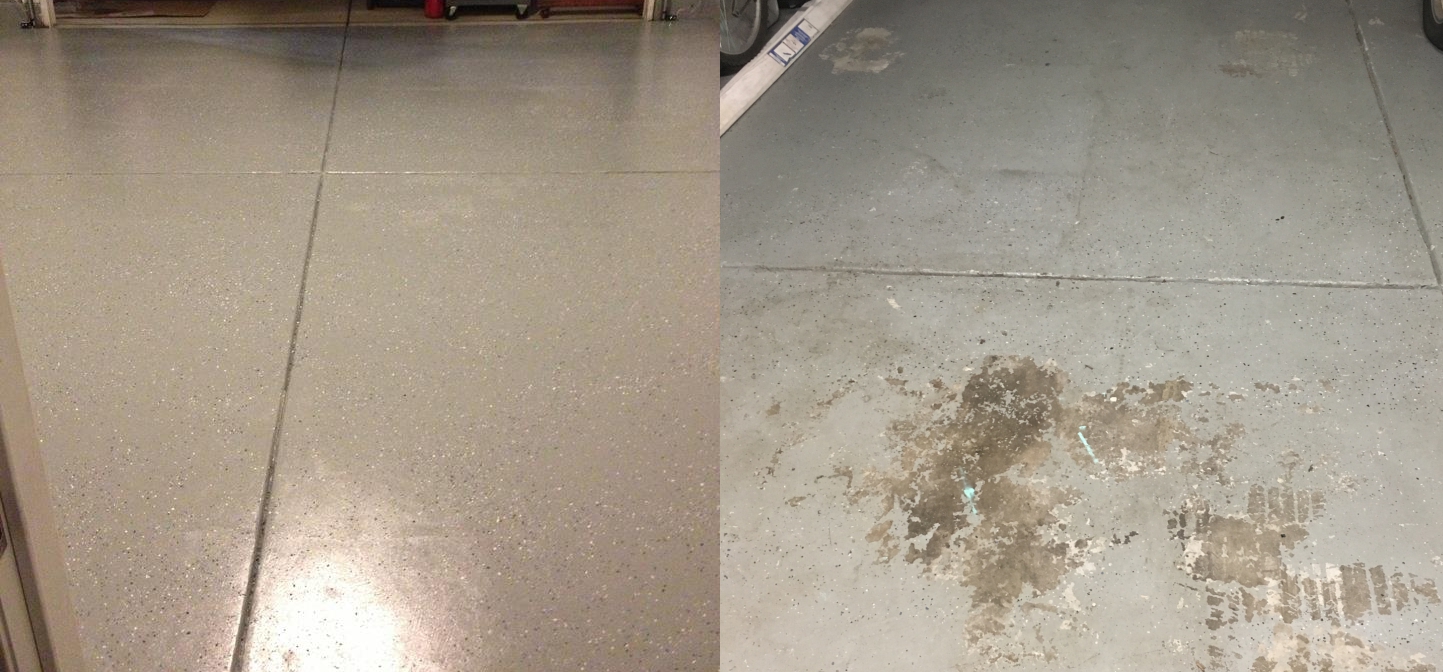
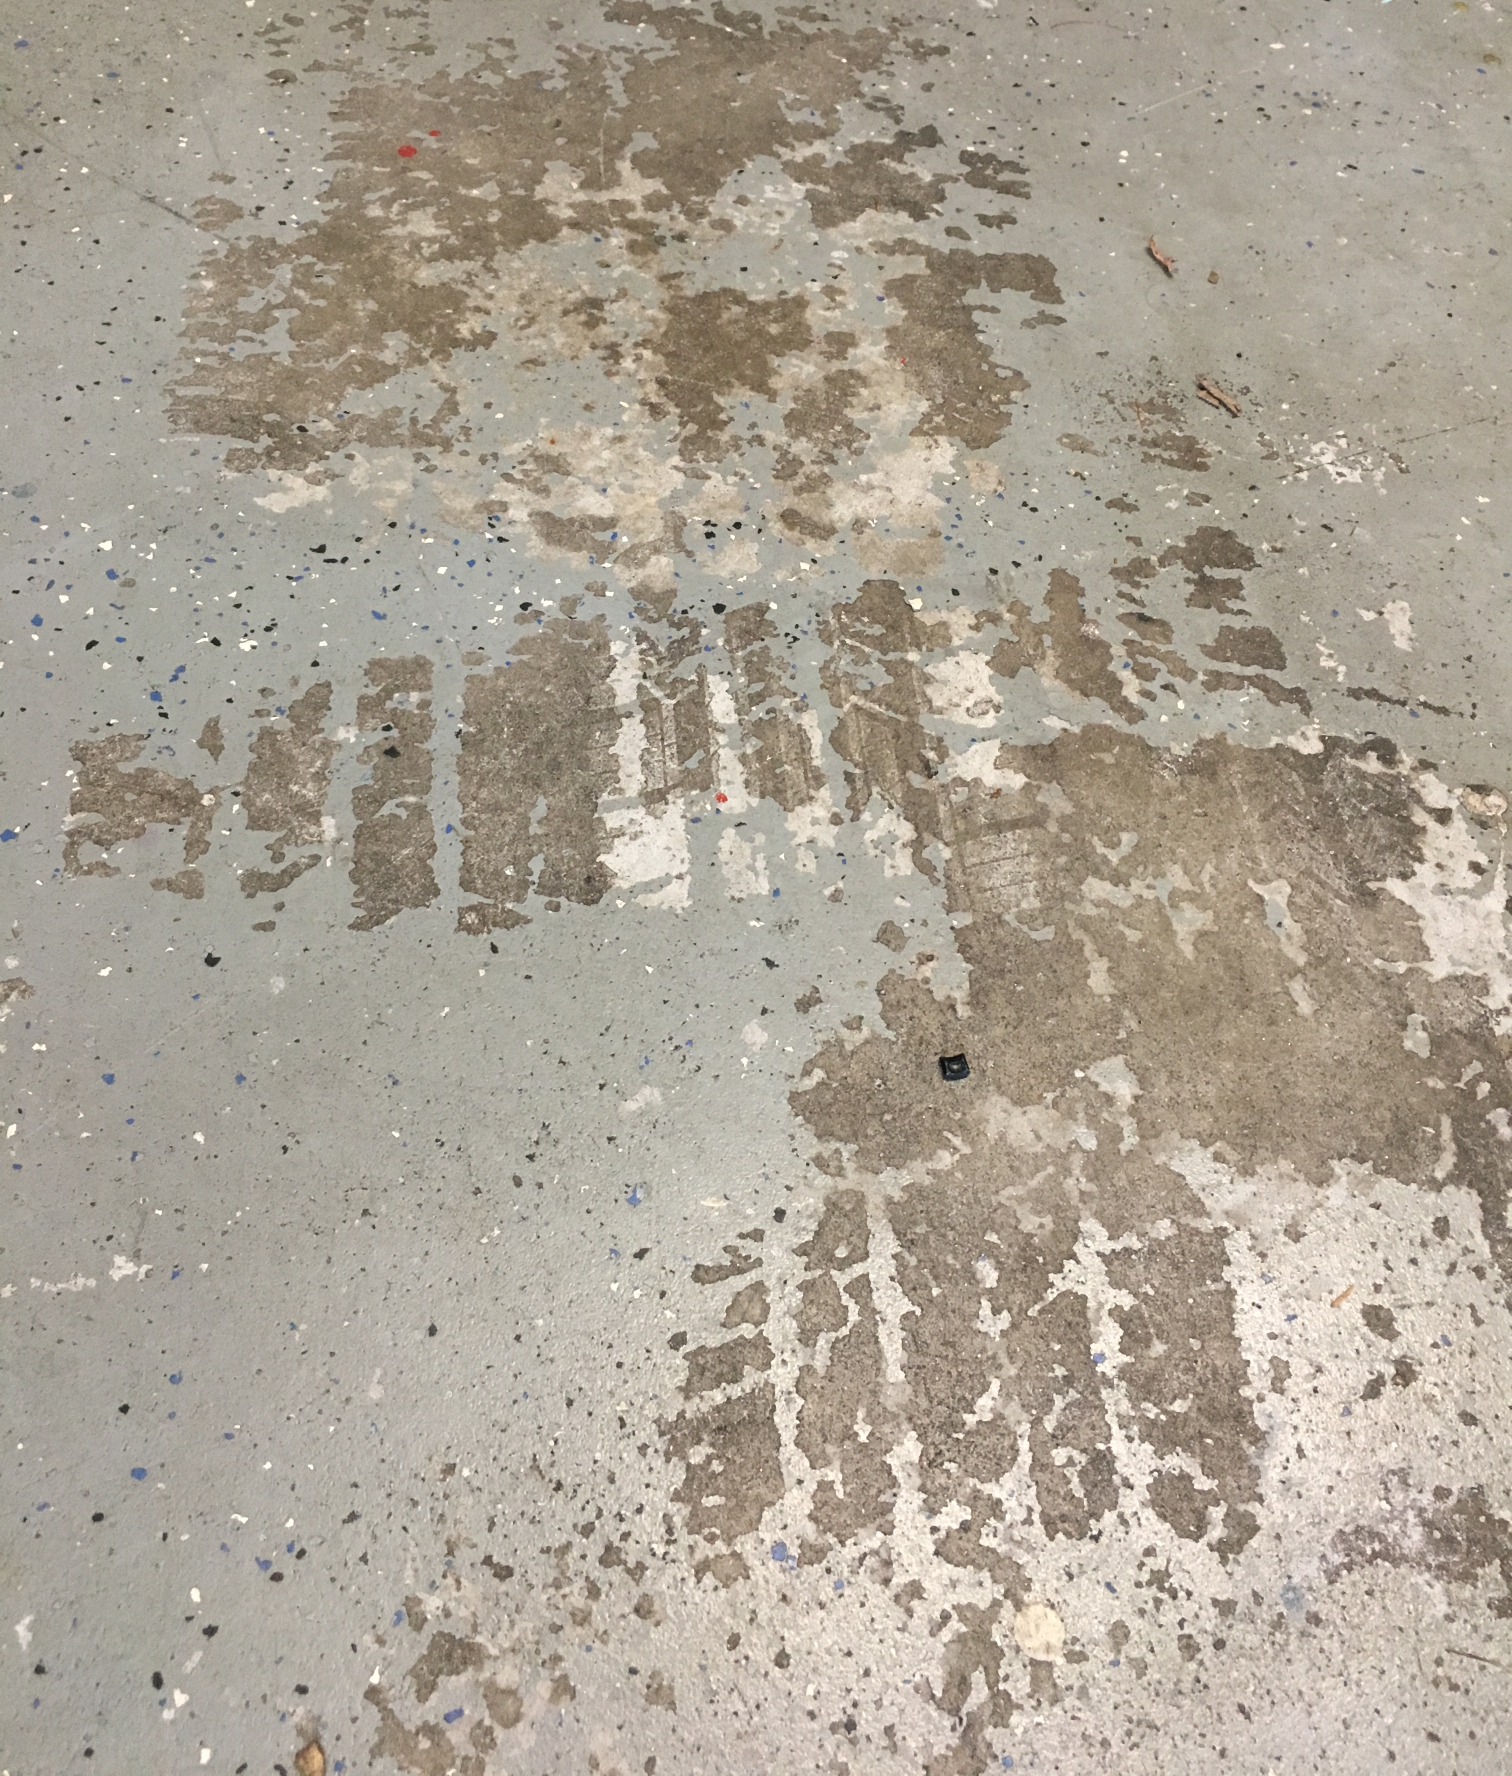
Below is a 2 car garage floor that was coated with a Quikrete water based epoxy floor coating kit from one of the big home improvement stores. The floor had oil stains and was about 3 years old when the coating was applied. It was lightly acid etched before hand and washed. None of the above tests were performed and the acid etching may have not been done correctly, there is no way to know for sure. However there was not a clear top coat applied, that is for sure and the floor started suffering from hot tire pickup and moisture spotting.
As you can see in the spots from the picture below, the parts that have peeled up are mostly from the tires and from puddles of water from the A/C system sweating. The vehicle that is usually parked here doesn’t leak any fluids, however there has been multiple oil spills from regular oil changes.
This floor would have benefited greatly from even just a good clear top coat.
Garage Floor Epoxy FAQs
It’s important to answer all the questions you have about applying a epoxy floor coating before trying to tackle the job. It’ll help you prep your concrete surface properly to ensure a good bond from the epoxy to the concrete. This will help keep your garage floor nice for years to come.
What is Garage Floor Epoxy?
Epoxy is made up of two parts, one is polyamine hardener and the other part is epoxy resin. Bot of these parts are required to be mixed together right before application which creates the epoxy coating. Application needs to be done quickly after mixing because of time and temperature plays a role in hardening.
These epoxy coatings cure and do not dry like paint, this creates a cross-linking if it’s 2 parts while it cures. This creates a hard and durable surface that seals the concrete surface making it resistant to stains, chemicals and abrasion. The amount of resistance and durability of the coating depends on the quality of the coating and amount of solids in the epoxy.
How Hard is it to Apply Epoxy Coating?
The difficulty of the application depends on the thickness and volume of solids content in the epoxy. Epoxy solids are displayed as a percentage. For example a 100% Solids Epoxy means that you have 100% of the the product on the floor after curing. This all depends on the carrier agents which are water or solvents.
Another example of application is when a 100% solids epoxy is applied with a roller, it has a wet film thickness (WFT) or approximately 10 mils and once it cures the fry film thickness (DFT) remains at approximately 10 mils. Now with a long solid content like with a 50% solids epoxy will have an approximate WFT thickness of 6 mils, but when it cures the coating thickness is thinner at a DFT of about 3 mils. This is because of the water parts evaporating while the coating drys.
The 100% solids epoxy are harder to work with because they have a thicker viscosity with a very limited window of time for application since they dry much quicker. The lesser epoxy solids are much easier to work with since they have less viscosity and a longer time window for application. Most DIY Garage Floor Epoxy Coating Kits some with the 48% solid epoxies.
Are Epoxy Coating Kits Bad?
DIY Garage Floor Epoxy Coating Kits are not necessarily bad nor good. They are just the easier more inexpensive method of epoxy floor coatings that you can buy at your local home improvement store or on many online outlets like Amazon. These contain around 48% solids, meaning they’re easier to apply, but also have a thinner coating making them less durable then more commercial grade 100% solids. These kits are often referred to has Epoxy Paint, because they are just about as easy to apply has a latex paint would be.
This easier application is one of the most common marketing points of these kits to Do It Yourselfers. These kits are much easier to apply them the more expensive, more premium, more durable ,multiple coat epoxy coating systems.
These kits would really benefit from a good strong Clear Top Coat such as a Foundation Armor UTN60 Clear Urethane Coat or a Coloredepoxies Top Coat Epoxy Finish Polyurethane. Both of these clear tops are great highly rated professional grade top coats that work great on epoxy coated garage floors. They will add thickness, durability and more stain resistance helping to make your showroom floor last for years to come.
How Much will my Epoxy Garage Floor Cost?
If you want to tackle the job yourself you can expect to have alot of time and elbow grease in the job more than anything. But the typical two car garage that averages 400 sq feet will cost around $150 for a lower grade epoxy paint type coating and upwards of $250-$300 for a thicker 100% solids epoxy coating kit. These are just averages, costs will vary. Plus add in the cost of required tools.
Now if you’re not interested in doing it yourself and to hire a professional, you can expect to pay around $1,500-$2,000 to upwards of $4,000 or more depending on the size of your garage. It all depends on the coating you want to use and how much prep work is required for about concrete surface. Make sure you ask around for references before hiring a contractor to do your garage floor coating to ensure they known what their doing.
Why Is It Important To Seal Epoxy?
Well for one, it will had thickness improving the durability of your garage floor epoxy coating, making it last longer. Plus most sealers add a nice deep glossy shine making the floor coating pop like a showroom floor. The better sealers also help repel oil spills, grime and other contaminants stopping stains from happening.
What is Epoxy Garage Floor Paint?
Epoxy Paint is usually what manufacturers refer their DIY epoxy coating kits as. This is more appealing to DIY’ers because the epoxy is a lesser solid then regular coatings making it easier to apply. So well it isn’t really paint, it isn’t really 100% solid epoxy either. It’s simply a water based epoxy coating that acts more like paint. This also means that the final coating is thinner and not has durable. You can always add a top coat or sealer to help improve durability.
Don’t get epoxy paint confused with garage floor paint, as these are actually a latex acrylic product with no epoxy in it at all.
Whats Hot Tire Pickup?
Epoxy Coating Peel from Hot Tire Pickup
Hot tire pickup happens when a hot tire causes the epoxy coating to peel up from the hot tires after driving. The tires expand slightly from the heat and once this heat transfers from the tread into the epoxy coating underneath it and once the tire cools, the tire will contract slightly which literally causes the tire to grab and pull at the epoxy coating. A poorly prepped concrete surface before epoxy coating application along with a lower quality product can cause this to happen. So yes there is a way to stop this from happening.
How to Read Technical Data Sheets?
While your comparing epoxy coatings you should look at the Technical Data Sheets (TDS) of each product. If they’re not available at the store you can look them up online or request that a store rep looks them up for you. TDS outline the ingredients and properties of the epoxy product which gives you a better idea of how it compares to others.
Knowing the differences of epoxy coatings is important if you plan on hiring a contractor, because it will let you know exactly what your getting for your money.
Top 5 Best Garage Floor Epoxy Coatings
|
Ranking |
Image |
Product |
Overall Rating |
|---|---|---|---|
| 1. Read The Full Review |
 (4.4 / 5) (4.4 / 5)View Now On Amazon |
||
| 2. Read The Full Review |
Coloredepoxies 10019 Light Gray Epoxy Resin Coating 100% solids |  (4.3 / 5) (4.3 / 5)View Now On Amazon |
|
| 3. Read The Full Review |
 (4 / 5) (4 / 5)View Now On Amazon |
||
| 4. Read The Full Review |
(4 / 5) View Now On Amazon |
||
| 5. Read The Full Review |
 (3.9 / 5) (3.9 / 5)View Now On Amazon |
Epoxy-Coat Full Kit up to 500 Sq Ft
Consumer Ratings (4.4 / 5)
The Epoxy-Coat Full Kit is a professional grade 100% solid epoxy that can do up to 500 square feet, which is more then enough for the typical two car garage. It comes in 15 different colors and even has a how to DVD to help Do It Yourselfers understand how the process works.
Along with a mixing bucket, 16 inch mechanical mixer, measuring stick, 3 inch chip, brush, 9 inch roller cover, squeegee, Part A & B, non-skid additive, prep solution, 1-1/2 lbs of flakes and a pair of vinyl gloves it really make this a complete coating kit, which is why we’ve rated it to be the best Garage Floor Epoxy kit you can buy. This is the most user friendly professional grade kit you can find.
All you’ll need to buy beside this kit is a roller and clear top coat if you desire. We highly recommend a clear top coat as it can only benefit you in the long run as it increases the durability of your newly coated concrete floor.
Color Options
Beige, Black, Blue, Clear, Dark Gray, Green, Light Gray, Orange, Red, Smoke Blue, Tan, Taupe, Tile Red, White and Yellow.
Features
- Lifetime Guarantee against peeling and lifting
- Made in the USA!
- 1 COAT COVERAGE/Clear Coat Recommended!
- No Odor – Slip Resistant – Anti-Microbial
- Average dry time in 12 hours
- Commercial grade thickness
- 15 Colors to choose from
- Multiple other uses beside garage floors
- 2 part 100% solids cycloaliphatic epoxy
- Mildew and water resistant
Recommended Steps By Consumer
– watch the instruction video and read the online instructions a few times (done before receiving product)
– clean out garage and sweep and vacuum entire floor
– pressure wash entire floor using light-medium pressure
– (optional then we painted the walls and ceiling a complementary color)
– using a flat razor, scrape off any remaining paint & glue & whatever junk still stuck to concrete
– with garden sprayer applied a strong mixture of “simply green” cleaner & warm water to the greasiest areas, then with a hand drill and a nylon bristle attachment, scrub these spots, repeat for the worse area using a wire attachment (skip if no grease spots)
– added TSP to the garden sprayer & 2 gallons warm water and let it sit, then pressure washed everything out (if the concrete is already clean this step can be skipped or shortened),
– applied the etch product from the epoxy-coat kit per the instructions, spray on, let sit a few mins, then rinse off twice. Squeegee out water.
– wait at least a day for the floor to be reasonably dry, then caulk any cracks or holes you don’t want to show. We used a high quality latex caulk rated for exterior use (you can buy anywhere)
– next day caulk anything you missed. Some caulk will likely have shrunk from the day before. If any sports still look slightly greasy (or discolored) grind these with the drill and wire brush attachment again. Just being sure (our concrete had many grease spots)
– important! leave the garage door open and wait enough days for floor to be completely dry. In our case, in 70-80 weather with average humidity (HI “winter”) this took 4 days. We ran some fans for an entire day to be sure.
– we had a corded drill specifically for mixing (a strong battery drill would likely be OK). I purchased extra matching paint chips from HD (we used about 50% more chips then came with EC package). Got some additional cheap paint brushes for the cut in. We had two pair of spike shoes (one surprisingly came with the kit). Don’t go cheap – you need the spikes. Lots of cardboard so we could lay down messy roller etc. We had a two extendable handles for the roller and the squeegee. We only needed the one squeegee and the roller that came with the kit, though we had extras on hand just in case.
– Our garage is roughly 400 sq ft (19 x 21) and we marked into four equal areas (pencil line on floor). We used duct tape and a string (as a straight guide) to mask off the garage opening such that the coating ended exactly where the door touched the floor.
– properly mixing A (base) with B (hardener) is the most important part of the job.I don’t advise using the very hard to see lines on the wood “dip” stick that comes with the kit. I had two small plastic pails which we used instead for measuring. I poured 28 oz of water into the smaller pail and marked the level both inside and outside with a sharpie. The inside line will become covered with hardener/base and partly erased, so make sure the outside line is visible from within. Tape on the outside would also work as a level marker. Do the same for the larger A pail, except use 68 oz of water. It is very important not to confuse the A and the B pails when mixing, which is why I used different sizes and colors and marked both (A vs B). After marking the appropriate levels dry the A and B measuring pails.
– These mix at 28 oz for B to 68 oz for A **exactly**, and you will get exactly four mixes out of the kit. We had barely a few drops left over when done, so it worked out perfect. Also a good idea to have several paint mixing sticks on hand to help get stuff out of pails.
– ready to mix and apply, we both put on spike shoes. Make sure all the nuts on the spikes are tightened (a few of ours came off). I found that duck tape wrapped around the entire spike / shoe combo worked better then the straps that come with the spike shoes (straps broke when tightened hard). I ran a timing app on my phone so we could hear the 3 minute mix time and the 10 minute roll time. Put on gloves.
– I poured B into the B pail up to the line, then poured that into the big black mixing bucket that comes with the kit. Then did same for A. Use the sticks to help get out A or B. Do not confuse the A vs B sticks! (B is clear which helps) Start the 3 minute timer. Mix for three minutes.
– pour mix out about 2′ from a wall in one area, then start the 10 min timer and start to squeegee it out. We had one guy squeegee and when halfway done the other guy started to cut in while we kept spreading with squeegee. You don’t have to be very neat or even with the squeegee, just spread the entire area. After the first guy was done cutting in and everything squeegeed, he started rolling the area. After 10 mins the entire area was rolled and we started mixing the next batch with the 3 in timer. Meanwhile one guy kept rolling. Be sure to put wet tools and buckets on cardboard not bare floor!
– do the same for the next area, except when done rolling, back roll first area. After all four areas and therefore the entire floor is rolled, back roll everything again starting with first area. Be sure to back roll over any small bubbles that tended to appear 20 mins after first roll. Usually one or two back rolls took care of this (we figured the last back roll should be about 45 mins after an area was first rolled). We also popped a few random late bubbles using our extension poll. By the time we started spreading the chips we had no bubbles (one or two showed up right after the chips but we were still able to pop with the pole).
– we divided all the chips into eight almost full dixie cups (again we purchased extra chips), so we spread two cups per area. We pretty much threw to the ceiling (9 ft in this case) and let spread naturally, though we tossed some more or less directly into corners. We were going for a random effect with some slightly more densely chipped areas, and it came out looking great.
– about 30 mins after we finished the chip spreading, we carefully removed the duct tape masking the garage door entrance.
– we finished the job around 4 in the afternoon and by 7am the next day I could walk on the floor. By the afternoon of the next day we were moving back furniture. I waited three full days before driving the car into the garage. Did I mention the floor looks awesome!
What Consumers Say about the Epoxy-Coat Full Kit
- This looks great and has totally transformed our very drab garage. The finish is shiny and slightly textured by the added paint chips. Seems to be very durable (so far) with no noticeable defects. We used the tan color for a “warm” look. Good results depend on the prep. We started with a 9 year old concrete floor that had never been sealed, and had numerous cracks, small holes (divots), grease spots and various stains. It was a mess.
- Things I loved about this kit:
-includes EVERYTHING you need, etch, flecks, brushes, roller cover, paint mixer, squeegee, gloves… Everything. I only added a roller handle, a broom, leaf blower, and that was it.
-Obviously high quality. It has only been down a month or so but I can say any failure in the future is unlikely.
-Customer service was A+, the first bucket of clear arrived damaged, and it was replaced immediately and received very quickly.Things I didn’t like:
-The anti skid in the clear was very sharp so I went with the Sherwin Williams Shark Grip and it is more “kid knee” friendly, but I highly recommend an antiskid of some type. The floor does get slick when wet.Advice:
-Make sure to cover the areas in the drive when coating. I didn’t and I have some drops of the clear coat here and there. The wife thinks its from the bubbles she used with the kids… I wonder how long I have until she figures it out…
-Get the spike shoes, well worth the investment -
I’ve used other epoxy floor products but Epoxy-Coat is far superior. It is super thick and has a very high gloss when dry. Other stuff spreads like paint, this is more like liquid rubber. On smooth concrete it covered the 500sf but if you have a rough floor plan on it covering less area. If the floor is very smooth consider using a 1/4″ nap roller instead of the 3/8″ that comes with the kit. Overall well worth paying a little more vs the big box store epoxy. Great customer service too.
View Epoxy-Coat Full Kit on Amazon Now
Coloredepoxies Epoxy Resin Coating 3 Gallon Kit
Consumer Ratings (4.3 / 5)
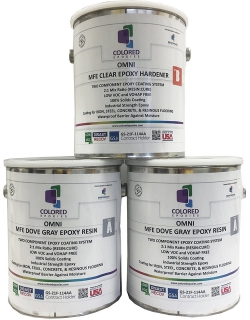
The Coloredepoxies 3 Gallon Epoxy Kit is another highly rated professional grade 100% solid odorless, waterproofing, mold and mildew resistant epoxy coating that’s Zero VOC & VOHAP free. The kit comes with instructions and three 1 gallon cans that cover between 125-170 square feet each(You do have to use all 3 at once). So this kit is enough to do the typical 2 car garage. There are 18 colors available to choose from.
The finish is a highly impact resistant high gloss finish that is very durable and known to not crack or chip. Like other kits this one does not come with a clear top coat which is highly recommended to improve durability and stain resistance.
While this kit doesn’t include everything you need to do the job like the above kit from Epoxy-Coat it’s 2/3 of the cost and is still an exceptional Garage Floor Epoxy Coating. This is perfect for anyone that might already have many of the items already required to get the job done.
Color Options
Beige, Black, Cyrstal Clear, Dark Blue, Dark Brown, Dark Gray, Light Beige, Light Blue, Light Gray, Red, White, Cammo Green, Clear, Mexican Red, Mongoose Beige, Safety Yellow, Green and Yellow.
Features
- Impact resistant super high gloss durable finish
- Zero voc & vohap free, uv resistant
- Application instruction included with each kit
- Non water based professional grade epoxy, waterproofing, mold and mildew resistant
- Very flexible 100% solids, odorless, the coverage per gallon is between 125 sq. ft to 170 sq. ft
- 100% Customer Satisfaction Guaranteed Full Refund on any Unopened Cans
- Rated to be Food Safe
What Consumers Say about the Coloeredepoxies 3 Gallon Kit
- I’d like to start with a big “thank you” to the Colored Epoxy for an exceptional product and their advice in the installation of my new beautiful epoxy floor.
I have never installed a three layered, I’m calling it, epoxy floor before and there are a few things one must understand before performing this task. The first lesson I learned is to actually READ the instructions. On my first purchase I did not. I knew that it was a 2 to 1 mix but I “didn’t believe” that I only had 20-25 minutes to apply it, but I found out the hard way, it was true. I mixed 5 gallons of resin and hardener together and started cutting in a 28×28 square foot garage it took about 27 minutes to cut it in. Once it was cut in, I ran over to start rolling but found that the epoxy had already hardened to the point that it was unusable. I had 4 1/2 gallons of unusable, rock solid epoxy. A VERY expensive lesson learned. READ THE DIRECTIONS and only mix what you can apply within 20 minutes. - This is shockingly easy to apply. I’ve never done anything like this and I hate even painting interior walls. I went from mixing epoxy to drinking beer on my patio in less than an hour. I can’t believe they charge $3-5k for this. Given the choice, I’d much rather epoxy my garage 3x than even paint the interior of my house. Super easy- don’t be intimidated.Tips and how I did it:
PREP! Chemically etch, pressure wash, etc. Clear out debris DO NOT CUT CORNERS HERE AND THE REST IS CAKEWALK.Have all the right tools. DO NOT try to do it without them.
Tools: Drill + mixing attachment, serrated (important) squeegee, HD gloves, lots of buckets and measuring cups (they’re all cheap at home depot), long (18″ or more) paint roller setup and epoxy specific roller), spikes (for shoes to walk around in) and a friend (so buy 2 squeegies and two sets of spikes. You only need one roller).Tighten all the bolts in your spike shoes. They look fine, but by the end, we were picking nuts and bolts out of the epoxy by hand and it sucked. - The best thing about this product, beyond being the best epoxy on the market, was the incredible product support and personal assistance with the application. Jason was very patient with all my questions. It was the first time I had ever applied an epoxy floor and it was a lot of work to prep my old garage floor, but it turned out beautiful and tough as nails. I expect it to out last even my children. The shipping was also no problem, arrived just as they had told me in about a week. I will definitely use them again as I have other applications for this product.
I Used the Mica chips over the dark grey epoxy and it looks awesome!
View the Coloredepoxies Epoxy Coating Kit on Amazon Now
Rust-Oleum EpoxyShield Garage Floor Coating
Consumer Ratings (4 / 5)
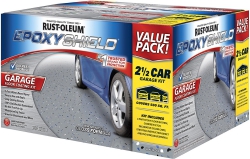
While the Rust-Oleum EpoxyShield Garage Floor Coating Kit is a water based epoxy it is easy to apply in just one coat. EpoxyShield is only available in two colors, a gray or tan. Since it’s water based it isn’t as thick has the 100% solid epoxies are and we highly recommend to use a clear top coat as always to increase the garage floor epoxy coatings durability. Since it’s not a 100% solid, it’s pot life is significantly longer, allowing you to take about 1-1/2 to 2 hours of application time vs about 30 minutes that the professional 100% solid epoxy have to apply.
This is not a professional grade epoxy coating such as the first two kits are, but that brings a much lower cost, but with the lower cost does bring less durability. That doesn’t mean this isn’t a good kit for what it is, when used in the appropriate situation this will last several years. If your primarily using your garage like most homeowners to store vehicles, yard tools and maybe a few kids tools and you don’t have heavy traffic, this kit will be just fine. This kit has enough product to cover the average 2 car garage.
The manufacturer says that if applied correctly it will resist hot tire pickup, cracking and peeling while still resisting stains from oil, antifreeze, salt, gasoline and other chemicals. This coating needs 3 days to cure before heavy traffic is allowed.
The EpoxyShield garage floor coating kit includes about half of what you’ll actually need to complete the job; a 2-part water based epoxy coating, concentrated cleaner, stir stick, decorative chips, detailed instructions and a instructional video. For anyone doing this for the first time, the instructional video is a high plus.
Features
- Professional looking semi-gloss finish
- Ready to drive on in 72 hours
- Covers up to 500 square feet
- Has a pot life of 1-1/2 to 2 hours
What Consumers Say about the Rust-Oleum EpoxyShield Kit
- I did this on my garage floor a a year ago. It’s easy to use and didn’t take long to do.
It still looks great, less dust tracking in because the concrete is sealed, it’s easier to clean, and did I mention it looks awesome.
Prep is the key, clean the floor and clean it again, then make sure it gets really dry. Roll out paint in about 3 ft. square sections at a time . Sprinkle the paint flakes on, they look much better than just a plain painted surface and they give just enough texture to keep it from being slippery.
Let it dry for a few days before you drive on it.
All my neighbors comment on how much they like the floor and 3 have already done theirs too. - I used this in a man cave and also a closet and garage. There is a lot of paint here. Get a roller and lay it on thick and its at first hard to roll but it will go quickly and do small area at a time and sprinkle the flakes and move on. Also used it on a wooden work bench and the product has held up perfectly for 8 months now no peeling. No issues. I am glad i got it.
-
So, this isn’t an easy process. First you have to clean the heck out of your floor (for me that was 1000 sq. ft.). Then you use the etching product to clean and rinse the floor again and after that is all done, the real fun begins! This epoxy does not roll on as easily as paint. It’s very thick. But it’s very beautiful when done and definitely worth it. I did my whole garage myself and it was a two day process to roll the epoxy on because once it gets to a certain temperature, it basically starts hardening in the tray. So plan ahead and you won’t be disappointed!
-
Pretty easy product to work with. Just make sure you follow the instructions and really clean the surface you are applying it too. Fortunately I used this in a new garage that hadn’t been exposed to oil, chemicals, etc. so the cleaning/etching process was pretty simple. Seems pretty durable. I would advise to work in small sections and pre-plan your painting path so as to not box yourself in. Comes with plenty of decorative chips. I was pretty liberal with them and still had quite a lot left over. If you’re doing a larger surface, it may be helpful to have more than 1 person applying the product as you may not have enough time before it starts to cure. I was surprised at how thin the product is when applying it.
View Rust-Oleum EpoxyShield Kit on Amazon Now
SUPERCOAT Epoxy Floor Coating
Consumer Ratings (4 / 5)
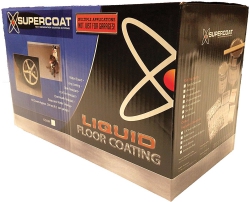
The SUPERCOAT Epoxy Floor Coating kit is a water based epoxy coating that’s available in three colors, Slate Gray, Firebrick Red and Sandstone. Since it’s not a 100% solid epoxy it is easy to apply however is not as durable as our top two professional grade epoxy coating kits. However this coating will still work well for many homeowners garages.
The kit includes a cleaner/de-greaser for preparing the garage floor surface, the two-part epoxy coating, an anti-slip aggregate, decorative flakes, a stir-stick and instructions.
This kit is designed for the typical 1 car garage, so for a 2 car you will need 2 kits or even 3 according to some consumers.
The SUPERCOAT manufacturer claims no acid etching or mechanical prep is necessary for their water based epoxy to adhere to garage floor surfaces. However you should be skeptical of this claim because most surfaces need at least a good acid etching in order for the epoxy coating to adhere properly. Most of the time when this step is skipped, you have peeling in just a few short years with heavy use. As always, it is recommended to use a clear top coat after applying the epoxy coating.
Features
- Unique coating that allows moisture vapor to pass through
- 200-250 Square foot coverage
- Non-Skid Additive included
- Water based Epoxy makes for easy application
- Provides protection against hot tire lift
What Consumers Say about the SUPERCOAT Epoxy Coating Kit
View the SUPERCOAT Epoxy Floor Coating Kit on Amazon Now
Valspar Epoxy Garage Floor Coating Kit
Consumer Ratings (3.9 / 5)
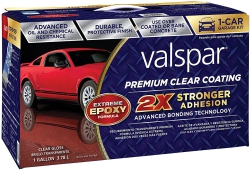
The Valspar Epoxy Garage Floor Coating Kit is an water based epoxy coating and is available in clear or light gray. It’s a two part epoxy like most other kits and it’s a one coat system. You should also consider a clear top coat for added durability.
The manufacturer claims it has an advanced bonding technology, but like with any epoxy garage floor coating, prepping the concrete surface is very important for a long last garage floor coating that isn’t going to peel.
This kit is is for 250 square feet which is the size of the typical 1 car garage and for the price you really should think about using another kit, that is really what holds this kit back.
You can expect Valspar to perform like the Rust-Oleum and SUPERCOAT kits since they are all water based. They are decent epoxy coatings for the average homeowner, as long the proper prep was done and a clear top coat is used you can expect it to last many years.
Features
- Semi-gloss finish
- Advanced bonding technology
- Anti-peel protection
- No hot-tire pickup
- Only 250 sq ft coverage
What Consumers Say about Valspar Epoxy Coating Kit
- This epoxy coating kit was easy to apply, but I had to buy 3 kits for my large 2 car garage. After spending several hundred dollars and now 3 years later I have peeling from “Hot Tire Pickup” I wish i would just went with a professional grade product. But was nice for a couple of years, maybe this would be a good product to coat a lightly used garage floor or if you are about to see your home to add a little “wow” factor.
-
Fantastic customer service!!! Quick response time. Great product. Just follow the directions. We didn’t have any trouble with the mixture hardening before we could get it applied. We topped it with the clear epoxy. The garage floor is beautiful and shiny! The movers did manage to scratch it in a couple of areas by dragging my motorcycle ramp across the floor. So I guess it’s not really that durable after all.
-
Very easy to apply, just work in small sections. If you work in too large of a section at a time, the first coat will dry too quickly. Then when you roll in the other direction, it will pick the first coat off the floor. So keep it small sections and there will be no problems. I did buy extra flakes as I prefer more flakes. It is simply a preference. some other may prefer less. I followed the instructions and coated it in both directions to make certain I had good coverage. Doing it this way results in covering an area 11X12 or about 130 sq.feet. So I had to order 2 more kits. I then top coated with the clear coat from Valspar for a little more shine. Dirt is the enemy so keep the area as clean as possible. I used a roller and a brush and threw them away, as this stuff is very hard to clean up. Very simple application, and I’m sure most people can get very awesome results. I just applied it so I am unsure of the durability.
View Valspar Epoxy Floor Coating Kit on Amazon Now
Two Clear Top Coat Coatings You Should Consider
If you are going to spend all that time and money to apply a nice new epoxy coating to your garage floor, you really should consider using a final Clear Top Coat. This will add more thickness, durability, stain resistance and shine to your freshly coated garage floor. The added cost is worth the floor coating lasting for years to come, instead of having to re-coat the floor in 3-5 years because of peeling, hot tire pickup and so on.
Armor 3 Gallon UTN60 Urethane Coating
 (5 / 5)
The Armor UTN60 Clear High Gloss Aliphatic Urethane Concrete Floor Coating is a highly rated commercial grade clear top coat that contains proprietary additives for scratch and abrasion resistance. Since UTN60 is a pure aliphatic urethane, its one of the hardest, most durable clear coatings that’s also UV and Chemical resistant.
The UTN60 kit comes with three 1 gallon jugs which cover about 750-850 square feet in total. This superior clear top coat has great resistance to scratches, gasoline, oil, transmission fluid, other chemicals, acids, water, mold, mildew, staining and hot tire pickup.
The Armor UTN60 is an excellent coating for garage floors, auto service centers, warehouses, computer rooms, laboratories, aircraft hangars, cafeterias, exterior tanks and other areas where high performance, abrasion resistance and chemical resistance are required. There are color options available from the manufacturer, but you cannot order them online.
Note: Before applying this to a freshly coated epoxy garage floor, make sure it’s fully cured per the manufacturers suggestion, which is usually 24-72 hours.
What Consumers Say about the Armor UTN60 Clear Coating
- I just bought this product for the second time to apply to my newly built 30×40 garage I had built behind my house. I used this clear coat on top of an epoxy in my 2 car attached garage a couple of years ago and boy does this stuff work! The floor still looks like new thanks to this clear coating. There have been many things spilled on the surface along with heavy heavy traffic. I highly recommend this product to anyone that was a nice long lasting durable garage floor coating and isn’t afraid to spend some money and time to make it happen.
View Arbor UTN60 Clear Top Coating on Amazon Now
Top Coat Epoxy Finish Polyurethane
Consumer Ratings (4 / 5)
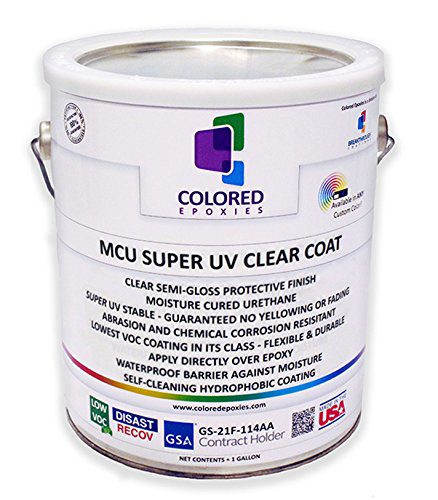
The Coloredepoxies Top-Coat Epoxy Finish is a moisture cured polyurethane that protects again UV damage, yellowing, staining with a long lasting wet look.
This is a highly rated professional grade semi gloss clear top coat that is both flexible and durable. One gallon container will cover approximately 350 square feet.
It’s both low VOC and VOHAP free and a waterproof barrier that protects against moisture, mold and mildew.
Note: Before applying this to a freshly coated epoxy garage floor, make sure it’s fully cured per the manufacturers suggestion, which is usually 24-72 hours.
What Consumers Say about the Coloredepoxies Top-Coat Epoxy Finish
- I recently clear coated my garage floor with this and it has worked out great so far. I just clear coated my freshly poured concrete to lock in the natural look. It’s been a couple months and i have spilled some oil and other chemicals on the floor and they wiped right off with no stains. So far it’s doing it’s job 100%!
- I had a contractor epoxy coat my 3 car garage in 2015 and they used this clear coat. Here I am 3-4 years later reviewing the products they used since my neighbors were asking about them then other day. My floor looks just like it did the day it was originally done. There are no issues or peel or hot tire pickup of any kind. I am very happy with this product, of course it probably helps that the professionals did it.
- I was disappointed that 1 gallon wouldn’t do my two car garage, but that it’s the companies fault. I had to order a second gallon to finish the job. So far it looks great and still looks like new.
View Coloredepoxies Top Coat Polyurethane on Amazon Now
Final Verdict: Garage Floor Epoxy
After reviewing all the different types of epoxy options available and the processes associated with them, we hope that we’ve made the process easier for you. Remember the absolute best garage floor epoxy is made with 100% solids and is of course the most expensive option for your garage floor covering. While it’s arguably the most economical form of floor covering, it can also easily become screwed up if you don’t follow the proper prep and application steps.
Regardless whether you’re wanting to coat a showroom floor or you just want something to protect your garage floor for years to come then one of these epoxy coating systems is bound to work for you. Don’t forget to consider using a clear top coat to improve the durability of your new floor coating and it will last for years to come, which really gives you a great return on your investment.