Introduction
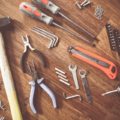
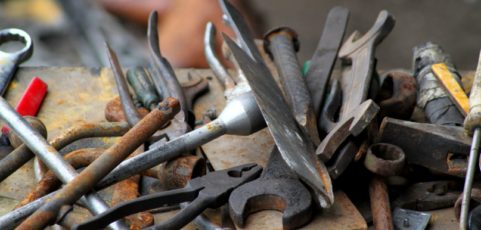
Maybe it’s been awhile since your last home improvement project or maybe you just picked up some old tools for cheap at the flea market and they’re a little rusty. Without regular use, metal tools are prone to rust, especially if stored in damp areas. The steel and iron that you’re tools are made of gets exposed to moisture and oxygen which causes a chemical reaction called oxidation, which leads to rust. No worries because rust is removable and there are many common ways to remove rust from metal tools.
If you’re a Do It Yourself-er’s, then you can probably handle removing rust from your tools. There are a handful of ways to remove use and we’ll detail them below. Then you can decide which method is best for you. No matter what the rust removal method used, it all starts with a few of the same basic principles. If you don’t wish to read through everything, reference the Table of Contents below and skip down to interests you.
Contents
RUST CONVERTER “Cover Up” METHOD
If you just have some basic tools or don’t mind a bumpy finish, then the Rust Converter Method if the easiest way to axe the rust. You can simply brush off flaky loose rust with a wire brush and apply the rust converter right over it. If you choose this method remember to use safety precautions, paint in well ventilated areas and prime before you paint for the best application.
Rust converters work well on most metals and handling it is simple. Rust converters are available in liquid or spray form at most home improvement centers or online at Amazon.com.
Tools and Materials Needed
- Wire brush
- Paintbrush
- Rust converter
- Primer
- Finish Paint
Step 1
Use a wire brush to scrape off any loose rust, dirt and flaking paint.
Step 2
Now apply the rust converter with a paintbrush or spray it on directly. What happens next is a the magic of chemistry. The rust will transform into a black substance, which prevents further rusting or corrosion.
Step 3
Once the rust converter has dried you can paint over it if you choose to match the color of the tool. In some cases this will help achieve a like new finish. It’s not a bad idea to prime the area first before applying the final coat of paint.
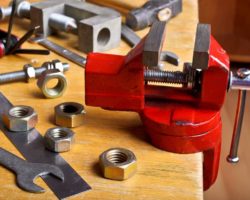
Elbow Grease Method: Get Physical – Scour, Scrape, and Sand
There is really no substitute for completely removing the rust all together. Sanding the surface with sandpaper or steel wool works well. You could even go as far using a wire brush on the end of an electric drill or use a bench grinder that’s fitted with a wire well. This would be the fastest and easiest way if you have access to those tools. Wire wheels work wonders around the corners and in the tight spaces.
If using sandpaper, then you’ll want to start with a coarse-grit making sure to remove all the pockmarks. Then move on to a smoother finished grit such as a 400. If you end up using a grinder, be careful that you do not keep the tool in one spot for too long. You could end up taking away some important metal and causing worse damage than that of the rust. Keep the tool moving at all times and remember to use safety goggles. If rust build up is bad enough there will likely be chucks of rust flying everywhere.
Tools and Materials Needed
- Dish detergent
- Coarse sandpaper, scouring pad, or steel wool
- Fine sandpaper
- Electric drill with wire wheel (optional)
- Bench Grinder (optional)
STEP 1
First start by cleaning the rusty tools in soapy water. This helps remove dirt and grease. Then, rinse the tool with water and dry thoroughly.
STEP 2
For lighter rust; scrub the surface with a scouring pad, sandpaper, or steel wool. Start first with the coarsest abrasive to remove the bulk of the built-up and pockmarks. Once the bigger pieces are gone now it’s time to switch to finer grit sandpaper to smooth out the grooves caused by the coarser grit. If you still see rust, then it’s time for a heavier duty option.
STEP 3 (optional)
For more serious rust problems or if you just want to skip step 2 and use power tools then, attach a wire wheel to an electric drill or bench grinder to blast away the stubborn rust. After this you can finish it off with a finer grit-400 sandpaper to remove any leftover residue and smooth out the finish.
Chemical Rust Remover “Soaking” Method
Remember to take lots of care when using chemical rust removers. These are powerful solvents that usually contain phosphoric or hydrochloric acid. Be sure to do this in a well-ventilated area, wear protective rubber gloves, eye wear and cover up all bear skin with full-length clothing.
You can immerse rust tools in rust remover, letting it soak for a couple hours or even all night depending on the rust severity. For larger objects that cannot be immersed in a bucket you have no worries. Some rust removers come in a gel form. Once applied, each product is made of different strength and will take different length of time. Also read the manufacturers directions thoroughly before continuing on with the project. If rust build is significant, it may take more than 1 chemical soaking before achieving desired results. But don’t forget about the “Elbow Grease” method. Sometimes after just 1 good chemical soaking you can use a wire wheel or brush attached to a power tool and whisk away the rust. But it’s not already that easy.
Using rust removing chemicals doesn’t always leave a smooth finish. But there are some newer products available that make this happen. Check out what the 5 best rust removers are below after reading the required steps of this method.
Tools and Materials Needed
- Dish detergent
- Rust Remover
- Goggles
- Bucket
- Rubber gloves
- Paintbrush
- Putty knife
- Rags
STEP 1
Before soaking the tool in rust remover clean the tool first with dish detergent and water. This gets grease and dirt off the tool so that it won’t block the rust removing process.
STEP 2
Before using the rust remover read the manufactures directions thoroughly. Then strap on your protective gloves and goggles. And, remember to work in a well-ventilated area to avoid breathing in toxic fumes. Now you can place the tool in the solution and make sure the tool is completely submerged.
STEP 3
Let the tool soak per manufactures suggested time period or in some cases until the rust is gone. Now would be a good time to have a couple while you wait. The waiting period all depends on rust build up and corrosion. After soaking be sure to thoroughly rinse and dry making sure the rust removing solution is gone.
Soak the tools for approximately 20 minutes, or until the rust is gone. (You may need more time or less depending on the level of corrosion.) Then, rinse, dry thoroughly, and store the tools once more.
Top 5 Tool Rust Removers and Converters
|
Image |
Product |
Price |
Rating |
| Loctite Naval Jelly Rust Dissolver |
$ |
 (4.1 / 5) (4.1 / 5) |
|
| WD-40 300045 Specialist Rust Remover Soak |
$$ |
(4.1 / 5) |
|
| Permatex 81756 Rust Dissolver Gel |
$ |
 (4.3 / 5) (4.3 / 5) |
|
| Corroseal 82331 Water-Based Rust Converter |
$$$ |
 (4.5 / 5) (4.5 / 5) |
|
| Evapo-Rust ER012 The Original Super Safe Rust Remover |
$$ |
 (4.6 / 5) (4.6 / 5) |
Rust Prevention Tips
We’ve covered three of the most common methods above for removing rust from tools, but the best solution tops them all and that is prevention. Here are a few tips on how to prevent having rusty tools. This is especially useful after having just spent time removing the unwanted rust.
- Always dry tools immediately after use. You can even spray them with WD-40 with protective white lithium grease, which has rust inhibitors formulated in it.
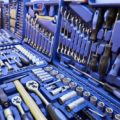
- If possibly store your tools in a dry, cool environment. Dust attracts moisture which can lead to rust.
- One way to keep your toolbox moisture-free is the use of silica gel packs. These gel packs absorb excess moisture.
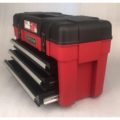
- Storing your tools in a wood toolbox helps too. Wood naturally absorbs any excess dampness.
- If moisture is a real problem or you just want maximum protection, then you could invest in a dehumidifier. This will control the air humidity levels saving your tools for moisture filled air all together.